This summer, I will be releasing all 20 Teacher Creator’s Toolbox videos here on the Core Inspiration blog. Teacher Creator’s Toolbox is a comprehensive guide to help you succeed as a seller in the TPT marketplace. If you are interested in watching these video tutorials in chronological order, visit my video index here.


WHAT YOU’LL LEARN
(00:26) Keep A Record Of The Artists You Use
(00:53) Credits Page Template
(01:18) Creating Your Own Credits Page
(01:46) Modifying Previous Projects To Increase Efficiency
(03:26) Credits Page Text and Calls To Action
(04:05) Adding Logos To Create Link Backs
(04:50) Using A List of Contributors
(07:35) Saving A Document As A PDF
(08:05) Tips For Establishing An Efficient System
Tool 5 Transcript
In this tutorial, I am going to teach you how to properly give credit to the graphic artists and font designers whose elements you incorporate into your resources. Or as I like to call it “giving credit where credit is due”.
The first step in this process is to keep a record.
As you design a resource, jot down each of the artists you have incorporated the moment you add their elements to your creation. You can always cross them off if you change your layout.
The fabulous organization system suggested to you in Tool 2 makes this easy because it allows you to store each artist’s elements in a file titled with the artist’s name.
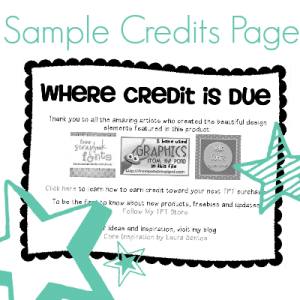
Once you are happy with the layout of your product, it’s time to transform your post-it note list into a fancy-schmancy “Credits Page”.
Below, I have links to both a PowerPoint version (it will likely look a little funky unless you have the fonts I’ve used) and a PDF credits page that serves as a more polished example.
Here are the steps I used to create that page.
Creating A Credits Page
The first time you ever create a credits page, you will need to go through the steps of adding a text box.
You can do this by selecting insert>text box or using the text box short cut in your toolbar.
Once you have added the box, you can add your text until you have the language you want.
Then you move on to adding a border and the logos of the artists, which I will show you in the moment.
Since I have already created many credits pages in the past, I am going to open up a document that already has a completed page within it.
I will copy that page from this document by right clicking and selecting “copy”.
Then I will hop back to my unfinished document, scrolling to the end, right clicking in the sidebar, and selecting “paste”.
This saves me tons of time because I can simply tweak what’s already written rather than starting from scratch.
Now, I want my credits page to visually coordinate with the rest of my resource, so I’m going to get rid of this border by clicking it and hitting “DELETE” or “BACKSPACE” on my keyboard and then scrolling upland selecting the matching border that I used throughout the resource.
The border is now resting on the top layer of the page, so when I click to edit other elements, it’s impossible because the border is covering the entire top layer.
Therefore, I right click, scroll to “arrange” and select “send to back”, or use my arrange shortcut on my toolbar and select “send to back”.
Now I can access the other layers of this page and edit.
Creating Brand Consistency On Your Credits Page
First, let’s work with the text. To help boost brand consistency, I like to use the same text and layout in all of my credits pages. Therefore, I am not going to revise any of the language I have included.
You will notice I have made some of the words blue like “click here”, “follow my TPT store” or “visit my blog”. These are called calls to action because they ask your customer to take action on something. I’ve made them blue so they stand out from the text around it – in Tool 6, I’m going to make those links live in my final PDF document.
Adding Logos of Graphic Artists: Part 1
Now, for THE most important step. Adding the logos of the graphic artists I used in this product.
According to my official sticky note record, I used the following artists in this resource:
- Bubbly Borders and More
- Hello Fonts by Jen Jones
- Free Scrapbook Fonts
- Teaching Tidbits and More with Jamie
- Prettiful Deisgns
Looks like this is going to be easy since many of the same artists where used in the resource I grabbed this credits page from. I totally did that on purpose to save time!
I do, however need to add Prettiful Designs to this credits page.
I am going to head to my product finalization/legal tools folder and open up my oh-so-handy document called “List of Contributors”.
This is where I store all the logos for each of the artists I love and a link to their store or blog.
Let me sidetrack for a moment to show you HOW to get these logos and links.
Sidenote: Gathering Logos For Your List of Contributors
Some artists, like the wonderful Ashley Hughes, make things easy for you by including a logo in your product download.
To get this logo into your list of contributors so it’s easier to access, open the image, click “Edit” > “Select All” then click “Edit” > “Copy”
Head back over to you List of Contributors document and paste the logo into the logos column.
To grab her website, I will simply head to her TPT store where I made the purchase, copy her store’s web address and paste it into my List of Contributors document.
Not all artists are as helpful as Ashley, so you may have to grab a logo from their website yourself.
For example, with one of my favorite designers, Prettiful Designs, I have to grab a logo from her store.
On a mac, simply click Command + Shift + 4 simultaneously.
A little cross finder will pop up, I will click and drag around the area I want to capture and it will capture that part of the screen for me like a picture.
The capture may open automatically in Preview for you or you may have to open it from your desktop.
Then, copy and paste the image into your List of Contributors.
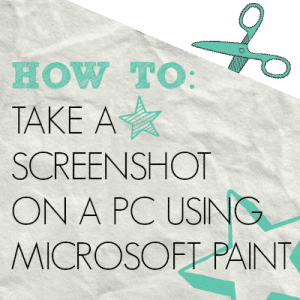
For PC users, you will see the detailed steps for how to grab part of the screen in the link below.
Adding Logos of Graphic Artists: Part 2
Since I need to add Prettiful DESIGN’S logo to my credits, I will select her logo from my list of contributors, right click “copy”, and paste it into my credits page.
I will adjust it so that it looks balanced on the page and viola! I have my credits page formatted.
Now I will save my document. And then save it again as a PDF so I can show you how to make these logos into live links that connect back to each artist’s store.
Increasing Efficiency
When you are first starting out, you will probably find it is fairly time consuming to get your system for creating essential pages like this set up and running to a high level of efficiency.
Although doing so is a bit tedious at first, don’t feel discouraged. Once you have your system up and running and you’ve done this a few times, you will be able to do everything I just showed you in a few short minutes.
One of the biggest time savers is creating a List of Contributors. You can create your own from scratch or use the link below to access my starter document.
When you are ready for the next step, watch Tool 6 where I will teach you how to embed links into your PDF documents so your credits page, or any page of your resources, becomes interactive.

